

8.14.2011
8.08.2011
I've Moved!
Well, not me personally, but I'm in the process of moving and combining my multiple blogs to make life easier for me. You may find that I have transferred some content from this blog over to my new location, but you might not. Most likely you were unaware that I have been juggling 5 blogs up until today (although some have become quite neglected), and so I decided to realign my blogging life to meet my new and improved lifestyle (compared to when most of my blogs were started). So... here's where you can find me now....
Art Teachers Hate Glitter- A blog about the realities of the day in the life of an art teacher. I very rarely post lesson plans or project ideas and instead I mostly write about the real-life struggles of being an elementary art teacher. With humor. Most of the time.
Sweet Feet Shuffle- My newest, consolidated blog (making One Blonde Girl and The Bittersweet Blonde obsolete). Things you'll find here will include DIY projects, links to cool and pretty things I like, posts about being a new mom, posts about things I may be doing in my everyday life, artsy posts, and whatever my new found happy-go-lucky self decides to write about. What you will not find here is the bitterness and down-on-life sh*t I was prone to writing about at my now defunct blogs. This blog is significantly less anonymous than my others.
The other two blogs that I'll be maintaining will remain out of the public realm. One is for my family and close friends, and the other is private, just for me and my daughter-to-be.
I hope that you can all find something you like with my content and can join me in my new home!
8.05.2011
The Nursery: The Wardrobe and Nightstand
The Wardrobe
There came a point during my planning of the nursery when I realized that our little one would not have sufficient storage, despite the fact that there's a double closet in her room. Unfortunately, the closet is already crammed full with some of Mr. H's clothes, his suitcases and extra bedding. I had originally intended on purchasing an Expedit bookcase, filling it with all sorts of drawers and boxes and using that as storage (At the time, I was still under the impression that I would be using the dresser as a changing table and the monster of a console table would be leaving the room).Mr. H. stumbled upon the PAX wardrobe systems on one of our trips to IKEA, and he was convinced this was what we were going to get. I was not so convinced. In fact, it took two trips to IKEA to get me on board. I thought the concept was great, but the price tag and the size of the system was a little much. But I was eventually sold on the idea, and the cost was justified by reasoning that this wardrobe can change and grow and be adapted to our needs (or our daughter's) over the years to come. Plus, it was pretty cool picking out what elements to put inside it. This system is 100% customizable.
Normally I'm not a white furniture kind of person, but Mr. H. insisted that we get white because he didn't want any dark, menacing furniture in the baby's room. Fine. However, since we were unable to paint the walls of the room (we rent), I decided that the wardrobe needed some color. And not just any paint color would do. I wanted chalkboard paint.
Check out the makeover...

The basic PAX wardrobe we purchased.
Supplies:
PAX wardrobe ($320.00*)
Tack cloth (Leftover from dresser redo- $0)
Primer (Leftover from dresser redo- $0)
Pea Pod chalkboard paint (Rust-Oleum Tintable Chalkboard Paint- $12.98)
Deep Teal chalkboard paint (Leftover from dresser redo- $0)
Painter's tape (Leftover from dresser redo- $0)
Paint tray and high density foam roller with extra cover (Leftover from dresser redo, and new cover- $2.50)
2 foam brushes (1 from dresser redo, 1 new- $0.67)
Paint stirrers ($0)
Rags and drop cloths (already owned misc. sheets and towels- $0)
* price includes frame, 2 doors, 2 basket drawers, 1 easy access drawer, 2 SKUBB storage box sets, 2 shelves, 1 clothes rack, and all necessary hardware.
** price includes shipping
Yellow spray paint for hardware (Leftover from artwork project- $0)
New hardware (Purchased from Etsy- $8.25**)
Total Cost: about $344.40New hardware (Purchased from Etsy- $8.25**)
* price includes frame, 2 doors, 2 basket drawers, 1 easy access drawer, 2 SKUBB storage box sets, 2 shelves, 1 clothes rack, and all necessary hardware.
** price includes shipping

Taped and painting the pea pod (love!). I think I went with four layers of paint for this project as well. I had some difficulties getting the nice clean edges that I wanted. I prefer not to talk about it.

Now the deep teal.

For some reason I thought I had a full pic of the wardrobe, but I guess not, and I'm too lazy to go take one now. You can't see the hardware on the doors (because it's not on yet), but scroll down and check out the knob on the nightstand. Same thing.
The Nightstand
I realized that I needed some sort of table next to the rocking chair for whatever necessities I might need during feedings. I liked the idea of adding chalkboard paint to the top so I could make notes or jot down any ideas I might have during late night feedings. It might not be as practical as I think, but at the time it seemed like a good idea. I searched and searched for the perfect table and ended up just getting one from Walmart (I already have the same nightstand in a dark color next to my bed). This project turned out okay, but as with the wardrobe, I had a VERY hard time getting the clean edges that I wanted with the painters tape that I used. I ended up having to hand paint the edges. It's not nearly as clean and neat as I imagined, but close enough.
And the transformation...

And the transformation...
The night stand (but imagine it's in white)
Supplies:
Curved night stand, white (from Walmart- $32.00)
Tack cloth (Leftover from dresser redo- $0)
Pea Pod chalkboard paint (Leftover from wardrobe makeover- $0)
Deep Teal chalkboard paint (Leftover from dresser redo- $0)
Painter's tape (Leftover from dresser redo- $0)
Paint tray and high density foam roller with extra cover (Leftover from dresser and wardrobe projects- $0)
2 foam brushes (1 from dresser and wardrobe projects- $0)
Paint stirrers ($0)
Rags and drop cloths (already owned misc. sheets and towels- $0)
Yellow spray paint for hardware (Leftover from artwork project- $0)
New hardware (Purchased from Etsy- about $4.00**)
Total Cost: about $36.00**price includes shipping

I taped off a border to mimic the curve of the night stand.

It looks okay here, just don't look too closely.
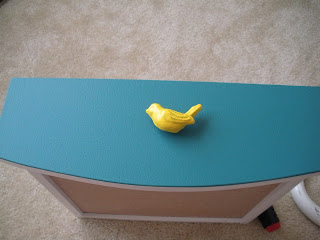 Switched out the plain white knob for a yellow spray painted bird knob.
 The finished stand, which coordinates nicely with the dresser and the wardrobe.


Other nursery project posts:
8.01.2011
10 Things I Love
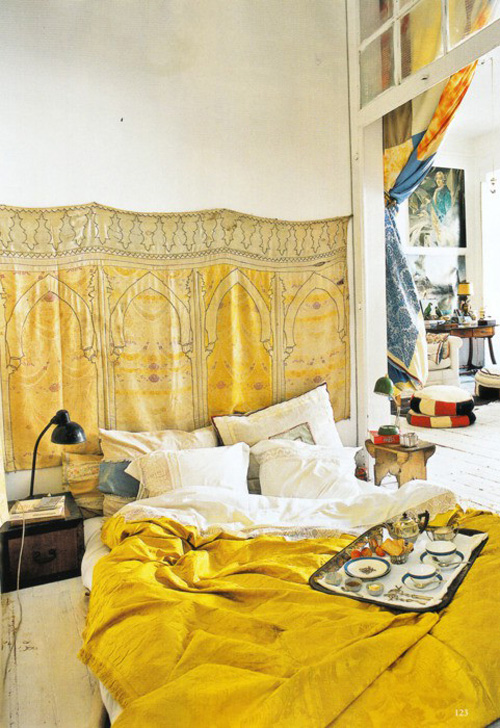
1. This bright and sunshiny room (Source)
2. Treehouses! (Source)

3. Retro colored appliances (Source)

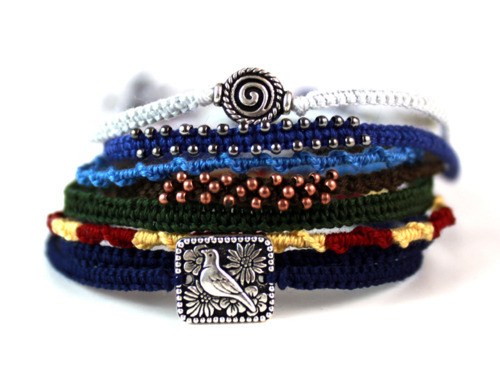
4. Friendship bracelets (Source)
5. Paper art by Yulia Brodskaya (Source)

6. Dirty feet! (Source)
 Mr. H always complains that my dirty feet make the bathtub gross,
but I see my dirty feet as a sign of accomplishment!
7. A pretty turquoise car! (Source)

8. Happy rainbow colors (Source)

9. Poms! (Source)

10. Not as colorful and festive as the images above, but these lovely fall outfits by Brochu Walker (Source)


4. Friendship bracelets (Source)
5. Paper art by Yulia Brodskaya (Source)
6. Dirty feet! (Source)
but I see my dirty feet as a sign of accomplishment!
7. A pretty turquoise car! (Source)
8. Happy rainbow colors (Source)
9. Poms! (Source)

10. Not as colorful and festive as the images above, but these lovely fall outfits by Brochu Walker (Source)
7.25.2011
The Nursery: The Dresser
I long ago "claimed" a dresser at my mom's house that once upon a time lived in either my grandmother's house or my great aunt's. While the paint on this dresser left a lot to be desired, I was in love with the Modern lines and feel of the dresser. "Claiming" the dresser meant my mom was not allowed to get rid of it or sell it and that someday I would return to New York to pick it up and give it a new home in my home. Well, that someday turned out to be this past June when, at 32-ish weeks pregnant, we returned to New York for one last visit with friends and family (and to attend my baby shower) prior to the arrival of Baby H (the 'H' standing for her last name, not her first, as we are no where near selecting a first name for her).

When I began planning the nursery for Baby H, I had grand visions of turning this dresser into a beautiful turquoise changing table (check out this post for the image of my original source for this vision). I set my mom on the task of measuring the dresser while I was creating a scaled floor plan of the nursery, but unfortunately, my memory of the size and dimensions of the dresser turned out to be much grander than it actually was. It was too narrow for a changing pad, too tall for comfortable diaper changing, and not quite long enough to fit other diapering necessities. Despite my stubborn insistence of not using a certain console table (that we had purchased from Walmart years ago and was already in the room) in the baby's nursery, it appeared to be my best option for a changing table. Especially since we wanted to use as much already owned or hand-me-down furniture as possible in the room. Plus, that thing was heavy and not only would it have required a lot to relocate it, we really didn't have any other place in the house to relocate it to, except for the garage, which already houses quite a bit ofuseful items that we'll someday have a need for again junk.
Despite knowing that I wouldn't be using the dresser as a changing table, and knowing that the odds of us having room for the dresser as a dresser in the tiny nursery were not good, my stubbornness insisted that we still pick it up in New York. I'm so glad we did too. As it turned out, with some slight floor plan rearranging, the dresser was going to fit in the room! And I still maintained my grand plans for a turquoise piece of furniture. Until, that is, I spotted a funky avocado green paint underneath the wretched, shiny, black paint (click on the image above to zoom in on it and you can see the green on one of the corners). It just so happens I'm in love with avocado green, and after noticing how easily the tape pulled off the black paint, I was convinced I could scrape away the black and save the green layer underneath (I had previously been informed that I would have to strip the entire dresser with a chemical paint stripper prior to painting it, and that I wouldn't be able to refinish the dresser until after the baby was born because of the chemicals. Yeah right. Like that was going to happen).
So without further ado, my dresser redo...


The dresser in all it's black & white glory. Packing tape had been wrapped around it to prevent the drawers
from opening during our travels. Some of the paint didn't survive the removal of the tape.
Please excuse the poor quality of the picture. Our garage is dark.
When I began planning the nursery for Baby H, I had grand visions of turning this dresser into a beautiful turquoise changing table (check out this post for the image of my original source for this vision). I set my mom on the task of measuring the dresser while I was creating a scaled floor plan of the nursery, but unfortunately, my memory of the size and dimensions of the dresser turned out to be much grander than it actually was. It was too narrow for a changing pad, too tall for comfortable diaper changing, and not quite long enough to fit other diapering necessities. Despite my stubborn insistence of not using a certain console table (that we had purchased from Walmart years ago and was already in the room) in the baby's nursery, it appeared to be my best option for a changing table. Especially since we wanted to use as much already owned or hand-me-down furniture as possible in the room. Plus, that thing was heavy and not only would it have required a lot to relocate it, we really didn't have any other place in the house to relocate it to, except for the garage, which already houses quite a bit of
Despite knowing that I wouldn't be using the dresser as a changing table, and knowing that the odds of us having room for the dresser as a dresser in the tiny nursery were not good, my stubbornness insisted that we still pick it up in New York. I'm so glad we did too. As it turned out, with some slight floor plan rearranging, the dresser was going to fit in the room! And I still maintained my grand plans for a turquoise piece of furniture. Until, that is, I spotted a funky avocado green paint underneath the wretched, shiny, black paint (click on the image above to zoom in on it and you can see the green on one of the corners). It just so happens I'm in love with avocado green, and after noticing how easily the tape pulled off the black paint, I was convinced I could scrape away the black and save the green layer underneath (I had previously been informed that I would have to strip the entire dresser with a chemical paint stripper prior to painting it, and that I wouldn't be able to refinish the dresser until after the baby was born because of the chemicals. Yeah right. Like that was going to happen).
So without further ado, my dresser redo...
Supplies:
Dresser (hand-me-down- $0)
Paint scrapers (already owned misc. clay tools- $0 Allway Tools wood scraper- $6.97)
220-Grit sanding sponge (I used 3M from Home Depot- $3.97)
Tack cloth (EZ Tack Cloth- $2.68)
Primer (1 Qt. Killz Odorless Water-Based White Primer- $10.98)
White spray paint for dresser (Rust-Oleum Painter's Touch Ultra Cover 2X- about $4)
White spray paint for hardware (Krylon Short Cuts- $2.98)
Deep Teal chalkboard paint (Rust-Oleum Tintable Chalkboard Paint- $12.98)
Painter's tape (ScotchBlue- $2.97)
Paint tray and high density foam roller with extra cover ($6.97)
2 foam brushes ($1.34)
Paint stirrers ($0)
Dust mask (3M Paint Odor Respirator- $4.47)
Rags and drop cloths (already owned misc. sheets and towels- $0)
Total Cost: about $60*
*These prices were taken from the internet since I no longer have my receipts and may not accurately represent my actual costs.

The dresser after removing the hardware and legs and scraping off most of the nasty black paint. I LOVE the green!
 Taping off a border for priming. I had decided that the green color, while I loved it, needed to be broken up a bit.
 Primed and almost ready for spray paint.
 Ready for some spray paint!
 Sprayed and drying. Notice I didn't take the time to do anything on the inside of the dresser?
It's not like anyone is going to see that part, right?
 Drawers with their first coat of chalkboard paint. I put a couple layers of primer on first.
 I don't know which coat this is (I needed a total of four for complete coverage), but the color is looking good!


It's not like anyone is going to see that part, right?


I was utterly terrified after completing all the painting that 1) the colors were going to be awful once the dresser was moved from the garage, 2) my vision wouldn't come to fruition, and 3) that this would be the ugliest dresser ever and I would have to redo the whole thing. I was actually quite frightened about the end result. I was really, truly prepared to hate this dresser. I wasn't sure, after living with it for a few days, if the green was too army colored for me, and I was sure that adding a white border on the sides was a mistake. I even took a trip out to Michael's to pick up some wooden trim and do-dads to decorate the dresser with in order to sweeten it up a bit. Really, I can't quite explain how convinced I was that this was going to be a garish, epic disaster.
And then I moved the dresser upstairs to the (very naturally well-lit) nursery. You know, just to see, and whoa, was I ever surprised! I LOVED it. I think it's the greatest piece of furniture ever and after assembling the entire thing, I was convinced that there's no other dresser more perfect for my nursery. Seriously, I cannot stop looking at it. And smiling! The dresser makes me smiley and happy! Talk about relieved! Here's a little preview of the dresser, minus the hardware, and not in it's proper location yet. I'm not going to reveal the final look until I reveal the entire nursery in a future post.

And then I moved the dresser upstairs to the (very naturally well-lit) nursery. You know, just to see, and whoa, was I ever surprised! I LOVED it. I think it's the greatest piece of furniture ever and after assembling the entire thing, I was convinced that there's no other dresser more perfect for my nursery. Seriously, I cannot stop looking at it. And smiling! The dresser makes me smiley and happy! Talk about relieved! Here's a little preview of the dresser, minus the hardware, and not in it's proper location yet. I'm not going to reveal the final look until I reveal the entire nursery in a future post.

Pretty promising, right?
As you can see, I went with yellow curtains in the nursery, as I had planned all along, although these were a bit darker than I originally intended. But we'll save that discussion for another day.
Other nursery project posts:
7.23.2011
The Nursery: Some DIY Decor Details
I truly believe "it's all in the details". The details can make or break a room design. Which is why I've been giving a lot of attention to the details of my baby's nursery. Here are just a few of the DIY "detail" projects I've completed. (If you missed my Sources of Inspiration post, check it out here)


Clothesline Alphabet

Supplies:
Alphabet Flash Cards (I purchased mine, designed by Lisa DeJohn, from Anthropologie- $14.95)
Clothesline (Mine came from a clever baby shower gift idea my youngest sister used- $0)
Clothes pins (Again, mine came from my baby shower- $0)
Hooks for hanging (I already had these- $0)
Total Cost: $14.95
Vintage Lamp with DIY Lamp Shade

Supplies:
Vintage Irmi lamp (Gifted to me by my wonderful twin sister- $0)
Small white lampshade (Mine came from Target- about $8.00)
Thick, patterned ribbon (Re-purposed from a diaper cake gifted to me at my baby shower
by my youngest sister- $0)
by my youngest sister- $0)
Thin, solid color ribbon (I used yellow, 3/8" Offray Tracks from Jo-Ann Fabric and Crafts- $2.49)
Glue gun and glue sticks (already owned- $0)
Total Cost: about $10.49
Wardrobe Drawer Tags

Supplies:
Thick, patterned and solid ribbon (Re-purposed from the same diaper cake as above- $0)
Pink pearl pins (already owned- $0)
Turquoise paper cut-out birds (Re-purposed from my baby shower decor- $0)
Sharpie marker (already owned- $0)
Total Cost: $0
Pink pearl pins (already owned- $0)
Turquoise paper cut-out birds (Re-purposed from my baby shower decor- $0)
Sharpie marker (already owned- $0)
Total Cost: $0
Other nursery project posts:
7.22.2011
Two Dream Rooms


Subscribe to:
Posts (Atom)


